How to Create a Trello Content Calendar
Contributed to by Katie Kovar
Why You Need a Trello Content Calendar
To understand the importance of a Trello content calendars, first, we need to understand the importance of content marketing.
Content marketing is an extremely effective branding and acquisition tool that costs up to 41% less per lead than paid search. Why does content marketing get such a great ROI? Because 47% of buyers look at a minimum of 3-5 pieces of content before deciding to move forward in the sales process.
But content marketing can get messy quickly. So how in the world can you organize all of your marketing materials when they need to be posted on 10 different platforms at 10 different times?
Content calendars are the best answer to obtaining an organized content strategy! When using a content calendar, you are able to streamline your content and detail exactly when and where your marketing materials are being posted.
Aside from staying organized, content calendars have many other benefits:
1. Gain Perspective
A content calendar will give you a better perspective of your overall marketing strategy. It’s much easier to maintain a unified voice across different platforms when all of your content is laid out in front of your eyes.
Plus, you will be able to make sure that you are hitting deadlines and can save yourself from the stress of forgetting to write an important blog post.
2. Consistency, Consistency, Consistency
Consistency is key! According to Techipedia, consistent brands are worth 20% more than those with inconsistencies in their messaging.
The best way to successfully market your brand is by offering relevant, engaging, and educational content to your target audience. Content calendars will make it much easier to see those irregular posts that stick out like sore thumbs when compared to the rest of your content.
3. Generate New Ideas
When you start organizing all of your content, the odds are that you will gain new insight into your marketing strategy. This kind of organizing is excellent for brainstorming and will most likely lead to a plethora of new ideas.
4. Clarify Ownership
If you are working with a team of people, content calendars will give you the ability to clarify who is responsible for each task. Not only will a content calendar help you eliminate any confusion that your team might have, but it will also enable everyone to take accountability for their work.
5. Facilitate Teamwork
When sales and marketing departments communicate effectively, they generate more leads and increase revenue. Statistics show that sales and marketing alignment can help your company become 67% better at closing deals. Content calendars make it much easier for all of the departments in your organization to be on the same page.
How to Use Trello to Create a Content Calendar
Trello is one of the best places to build and maintain a content calendar thanks to its user-friendly interface. Whether you or your team are trying to get more organized or are creating something new, Trello can be used for any project.
Below we have created a step-by-step guide that tells you everything you need to know to create your first content calendar on Trello.
Step 1: Create Your Board
First, you will want to head to Trello and click “Create a Board.” Once you have named your board, selected a background, and chosen whether you want it to be public or private, your board will open up.
Step 2: Add a Calendar Power-Up
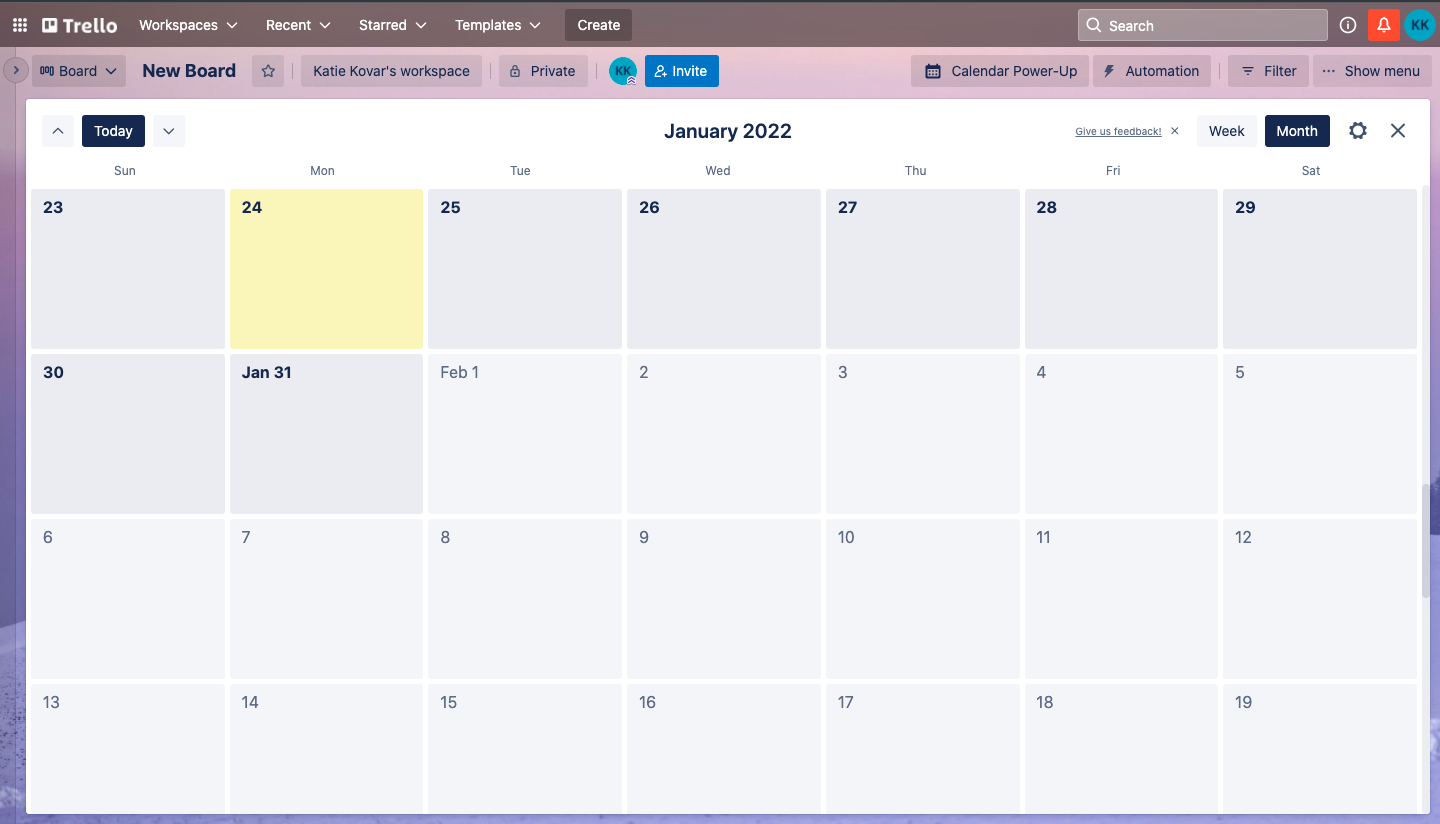
Click “Show Menu” in the top right corner and scroll down to the “Power-Ups” section. Next, click “Add Power-Up” and search for the “Calendar Power-Up.” Once you have found it you can add it to your board.
Now, exit out of the menu and you should see a “Calendar Power-Up” button in the top right corner. Double click it and your Trello board will switch to a calendar view.
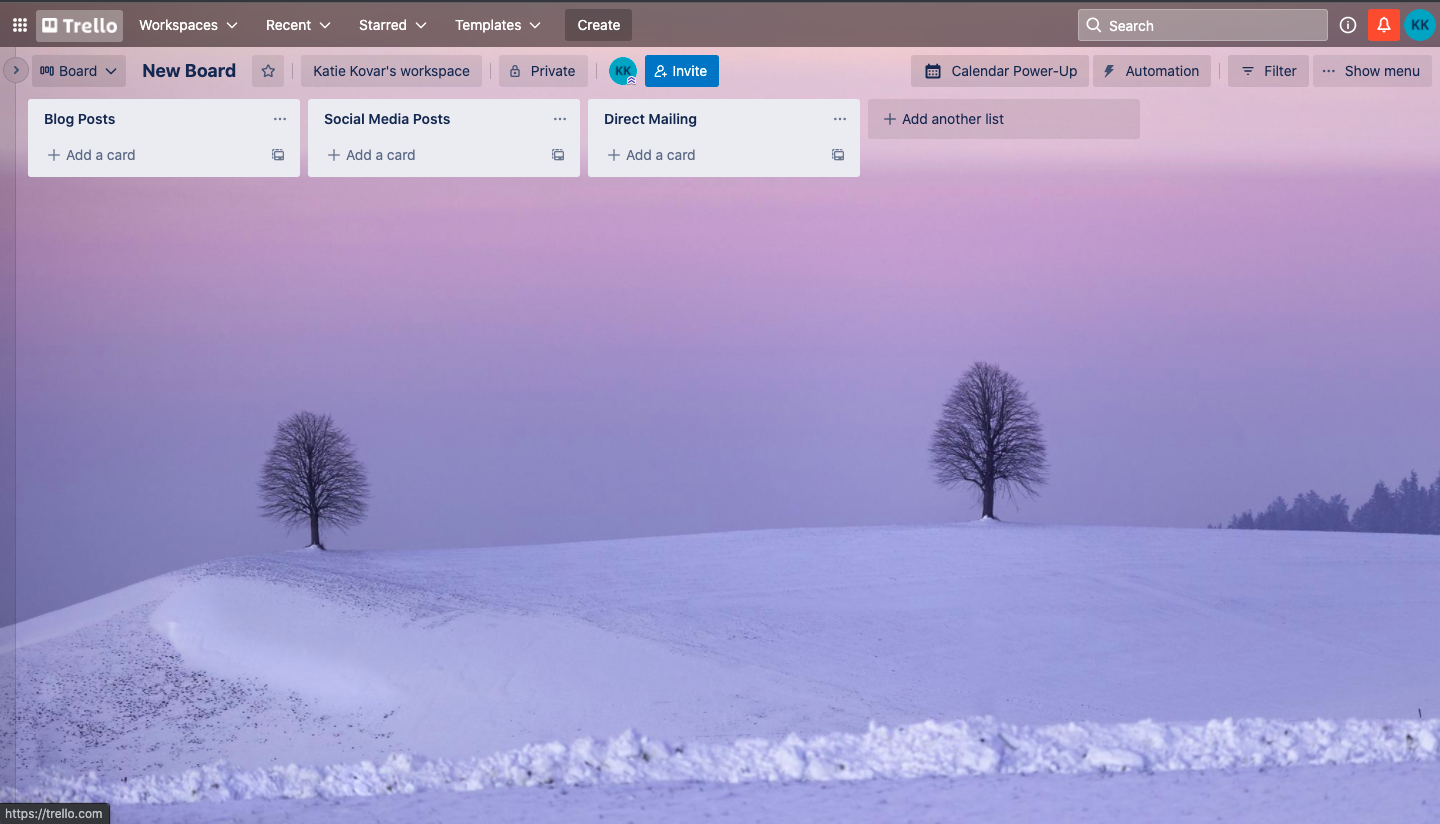
Step 3: Create a List for Each Platform You Use
Lists keep cards, or specific tasks or pieces of information, organized in their various stages of progress. Lists can be used to create a workflow where cards are moved across each step in the process from start to finish, or simply act as a place to keep track of ideas and information.
You can create as few or as many lists as you need. Some examples of lists you might want to make include blog posts, Facebook posts, TikTok posts, direct mailing lists, monthly giveaways, etc.
If you post the same thing to each social media platform, we recommend making a board that looks something like this: blog post list, direct mailing list, and social media posts list.
To actually create the lists, you will want to press the “X” in the top right corner to exit out of the calendar view; then, you should see 3 pre-created lists already on your board. You can delete and edit lists by clicking the ellipsis (…) in the top right corner of the list, or you can add new lists by simply pressing “Add Another List” which is located to the right of the lists that already exist.
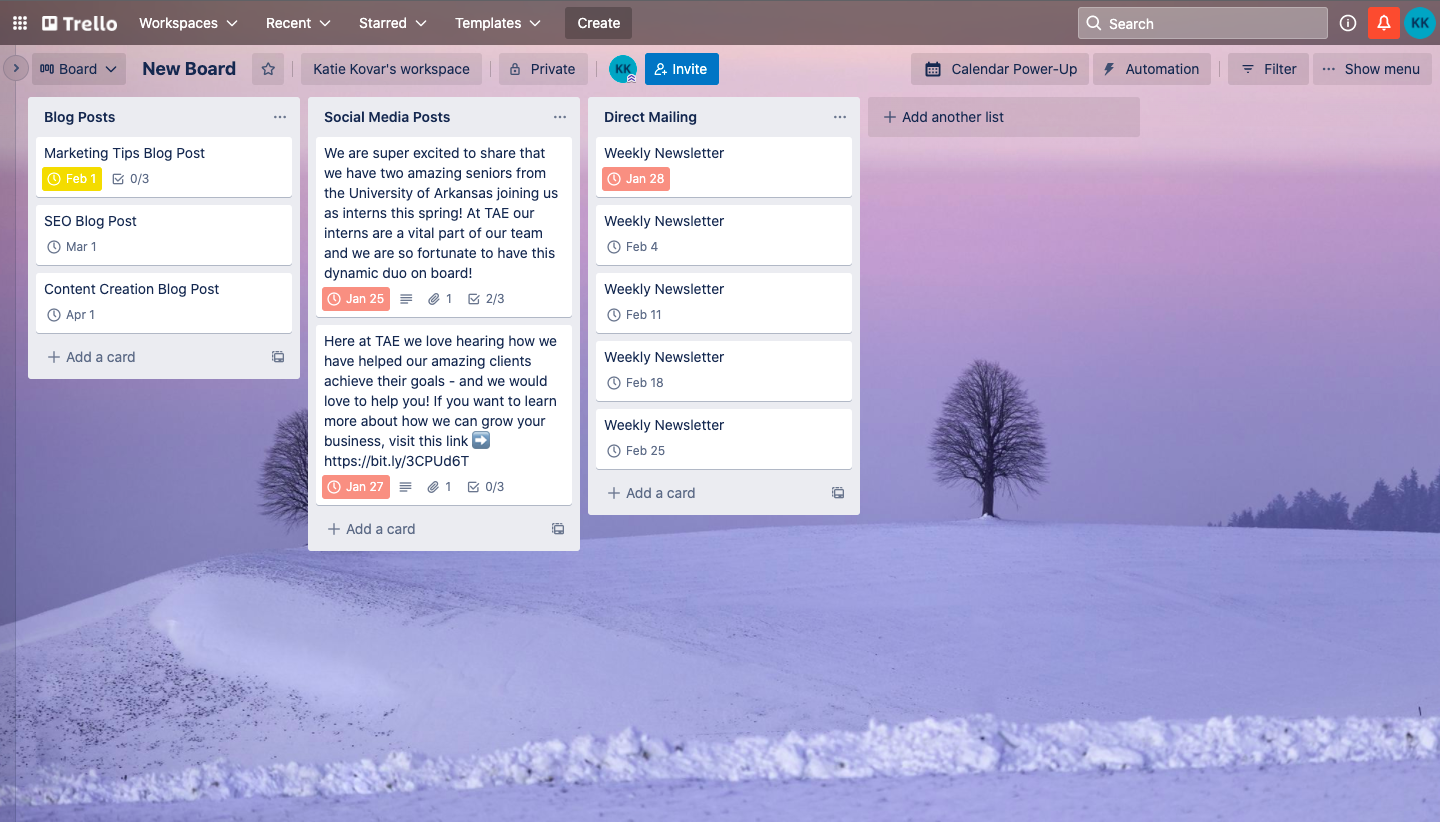
Step 4: Add Cards to Each List
Cards can be used to organize and schedule out all of the content that you are creating. For example, if you create and post weekly blogs, you can create a card for each blog that needs to be posted and set a date on it. This will help you stay organized and see exactly when each blog needs to be posted in the future.
To begin adding cards to your lists, you will want to click “Add a Card” underneath a list and enter a title.
Tip: For my “Social Media Posts” list I like to add the copy for each post directly into the title of the card. This makes it easier to navigate your board because each post is right there in front of your eyes.
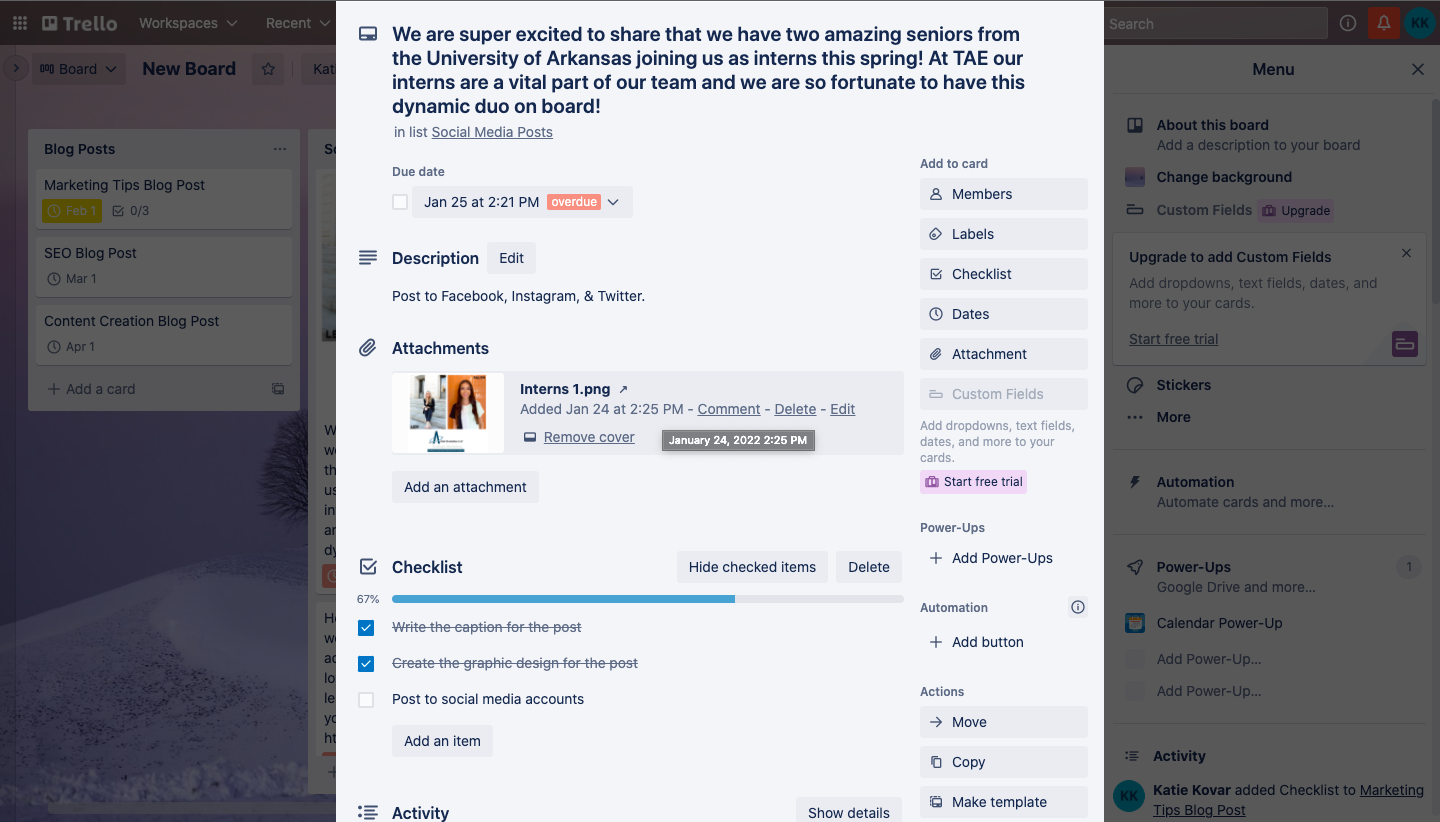
Step 5: Edit Your Cards
Once your cards have been added to your lists, you can edit them simply by clicking on them. Trello’s editing options give you the ability to:
- Set a due date
- Add an attachment (graphic designs, photos, etc.) and then set that attachment as a cover so it shows up on your board
- Add a description to the card
- Include other members to a card (helpful if you work with a business partner or a team)
- Visually organize your cards by adding colored labels
- Create a checklist
Tip: If you tend to use the same checklist inside each card, you can copy that checklist! All you have to do is click the “Checklist” button inside of a card and then click the “Copy items from…” button that pops up.
Now You’re Ready to Create a Trello Content Calendar
Now that you know the basics of Trello, you can start filling up your calendar with all your amazing content. Trello is very simple to use and packed with tons of tools, features, and Power-Ups that will allow you to customize your board and make your work more efficient.
If you are looking to maximize your Trello skills, check out this blog on Trello’s website about pro tips and tricks that can help you take your Trello board to the next level.
And if you need help on the content side of things, our team at TAE Nashville can help.
